Do you know how to make butter from scratch? Often taken for granted as a grocery store staple, making butter at home connects us with a tradition our ancestors discovered thousands of years ago. In fact, butter is thought to have been accidentally discovered when a prehistoric traveler opened his sheepskin to find that the milk, after jostling on the back of his pack animal, had transformed and solidified. Butter later had many uses across cultures, such as a healing ointment or a role in religious ceremonies. Overall, the repurposing of milk into butter and cheese was important for preservation in a time when refrigerators and pasteurization did not yet exist.
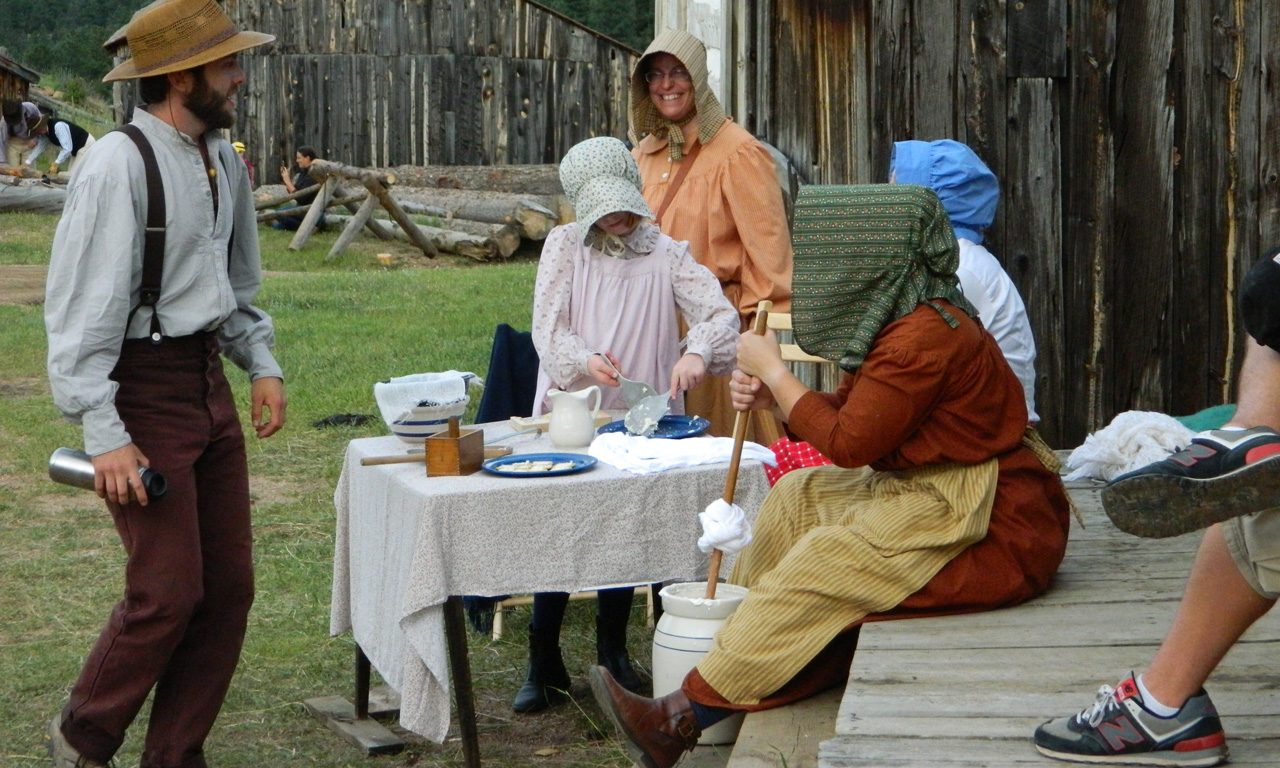
In our own backyard in Boulder County, early homesteaders relied on homemade butter and cheese as staples of their everyday diets. One example was the Walker family, who lived in the Boulder foothills from the late-1800s to the mid-1900s. In addition to Galloway cattle, the Walkers also had milk cows, likely Ayrshire, Jersey or Milking Shorthorns. With that milk, Phoebe Walker made butter to sell at the market in Boulder. Consumers recognized her butter by the rose imprint left by her wooden mold. In 1882, James Walker completed construction of the Spring House, which had a stone floor for spring water to run over and keep milk, butter and cheese cold. If dairy was stored in the root cellar, it could easily soak up unpleasant odors from vegetables also kept there.
From Milk to Butter
So just how does milk become butter? At the time of the Walkers, this magical process began by letting raw milk sit out overnight. The following day, a wooden or brass skimmer was used to collect the cream that had risen to the top (what is left behind is “skimmed milk”). The cream was then poured into a wooden butter churn fitted with a dasher, a rod with an X-shape at the bottom used as an agitator. The mechanical motion of churning separates the water from the fat particles in the cream. These particles fuse with each other and form larger fat globules, while the air is forced out of the mixture. Eventually the butter separates from the buttermilk, which was then used in baking or milkshakes. For the butter to “come,” the weather had to be just right. An outdoor temperature of 65 degrees was optimal; butter formed in about 20 minutes. On hot days, the butter churned would be soft and kept poorly, but on cold days it would take much longer to form. Once the buttermilk was poured off, the butter was rinsed with cold water and squeezed with wooden paddles to remove any extra moisture. At this point salt could be added, and then the butter was pressed into a wooden mold and finally packed with brine in linen, parchment, or barrels.
Do-it-Yourself: Butter Recipe
Our basic recipe employs an electric mixer instead of a traditional churn. Try your hand at making butter and take a trip back in time!
Materials
- 1 pint (2 cups) heavy whipping cream at room temperature
- 1/8 – 1/4 teaspoon salt
- Stand mixer with whisk attachment (or a hand mixer, food processor or blender)
- Fine mesh strainer
Directions
- Pour cream into mixing bowl. If the cream fills the bowl more than halfway, make the butter in batches to reduce overflow and splattering.
- Starting with the mixer on low, gradually increase the speed to medium and continue mixing for 5 to 15 minutes. The variation in time is due to the amount and temperature of the cream.
- After a few minutes, you will have whipped cream. Keep mixing until it separates into small clumps of butter and buttermilk.
- Pour out the buttermilk through the mesh strainer into a separate mixing bowl (can be saved for baking) and squeeze out extra with the wooden spoon.
- Cover the butter with clean, cold water and continue to work with the spoon to remove any remaining buttermilk. Drain and repeat this process several times until the water runs clear. The more buttermilk you separate from the butter, the longer it will last.
- Add salt and any variations, and work into the butter.
- Store the butter in a tightly sealed jar, plastic wrap, or wax paper in the fridge for up to two weeks.
Variations to try
- Honey Butter: Add ¼ cup honey
- Garlic and Herb Butter: Add 1 tablespoon finely minced garlic,
- 2 tablespoons chopped fresh herbs (basil, parsley, etc.) and
- 1 teaspoon olive oil
- Cinnamon Sugar Butter: Add ¼ cup brown sugar and 3/4 teaspoon cinnamon